If a top makes your arms feel heavier, shorter or somehow “wrong,” the problem may not be your arms at all. A few centimetres of sleeve, a visible forearm, a narrower cuff or a second layer can completely change the relationship between shoulder, arm, hand and the rest of the outfit.
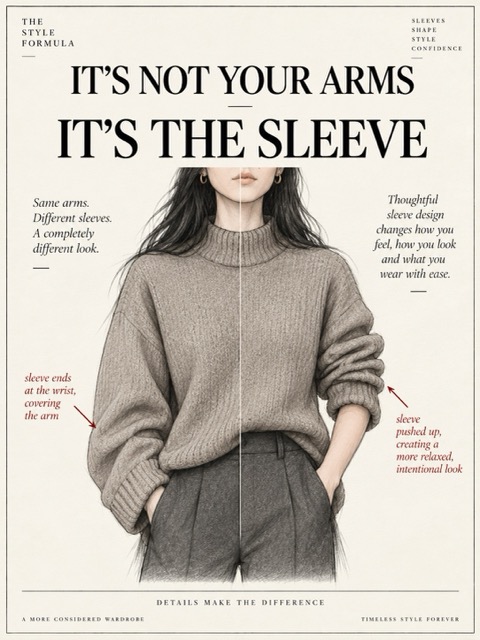
The sleeve is one of the quietest proportion tools in a wardrobe. We notice the colour, neckline and trousers first, but the sleeve decides where the eye stops, how much of the arm is visible and whether the hand feels connected to the rest of the outfit.
That means the same body can look completely different without changing the body at all. Push a sleeve upward and the forearm appears. End the garment earlier and the wrist gains space. Add volume above a smaller opening and the sleeve becomes a shape rather than a tube. Let another cuff or layer continue beyond the first sleeve and suddenly the ending looks intentional.
There are four useful ways to work with this. None requires hiding your arms. The goal is simply to choose where the sleeve ends, where the volume sits and what happens next.
The four sleeve moves
Think of these less as rules and more as four controls. You can reposition the sleeve, change its endpoint, change its width, or continue the line with another layer.
1 — Push it
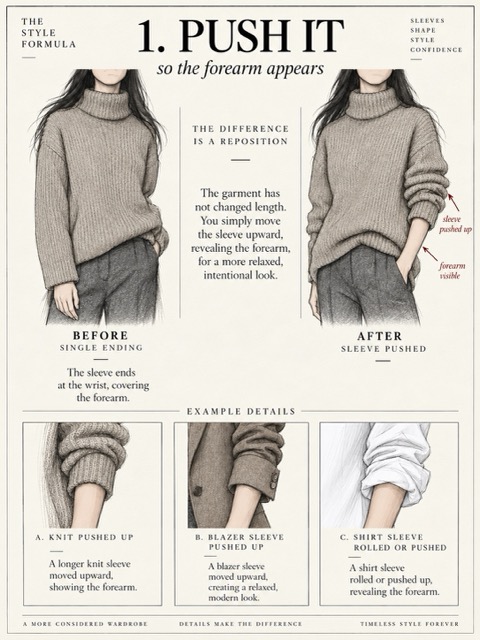
This is the simplest move because the garment itself does not change. You move the sleeve upward and reveal the forearm. Suddenly there is skin between the garment and the hand, which gives the eye a break and makes the whole upper body feel less enclosed.
It works particularly well with knits, shirts and soft jackets. The important part is that the pushed fabric looks deliberate rather than constantly slipping down. You want the effect to survive a cup of coffee, a coat, a seatbelt and an ordinary day.
2 — End it early
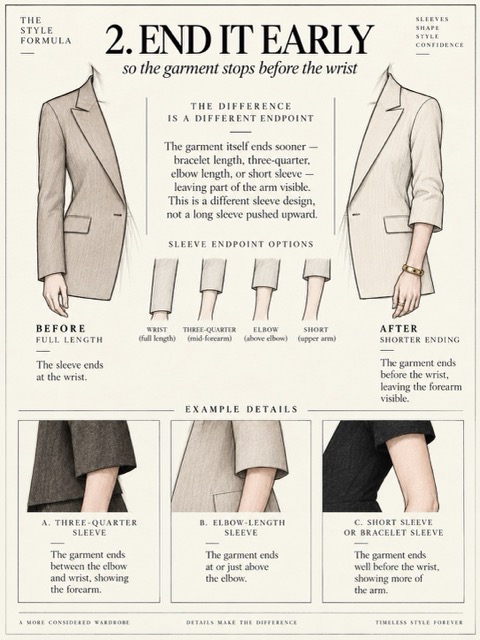
This time the garment itself has a different endpoint. Bracelet length, three-quarter sleeves, elbow sleeves and short sleeves all stop before the wrist, so the arm is not visually enclosed all the way to the hand.
This is different from pushing a long sleeve upward. The shorter ending is built into the garment, which can make it one of the easiest solutions if you prefer not to spend the day rearranging your clothes.
3 — Widen it
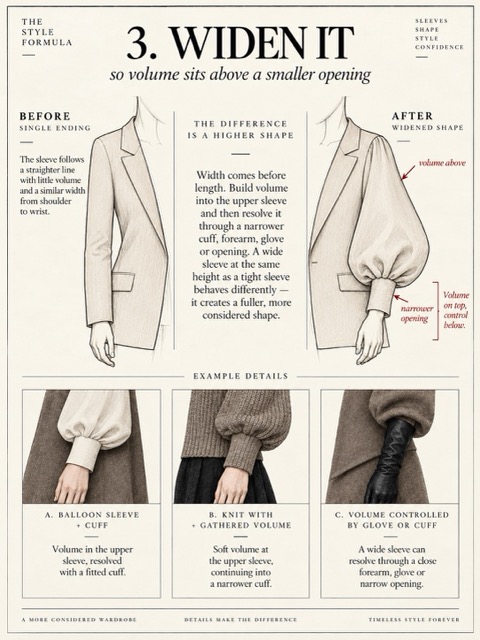
A sleeve does not have to become narrower in order to look lighter. Sometimes the more flattering move is the opposite: build volume higher on the arm and then resolve it through a smaller cuff, close forearm, glove or narrow opening.
The contrast is what matters. Volume above, control below. A balloon sleeve, gathered knit or softly widened jacket sleeve can create a far more intentional silhouette than a sleeve that maintains the same width from shoulder to wrist.
4 — Layer it
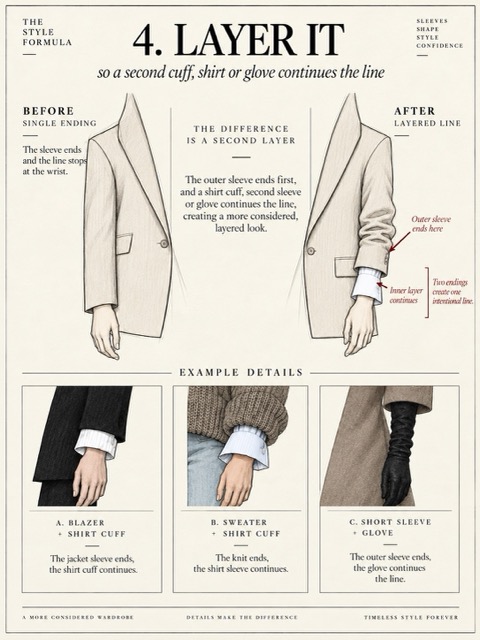
The sleeve does not always need to be the final ending. Let a shirt cuff, jersey layer or glove continue beyond it and two endings become one deliberate line.
This is why sleeveless knits and shorter outer sleeves can be so useful. You can use a crisp cuff, a soft blouse sleeve or a narrow jersey layer without fighting another sleeve inside it. The second layer becomes part of the design rather than something you are trying to conceal.
“Same arms. Different sleeves. A completely different line.”
11 pieces that make the sleeve easier
These are not here because everyone needs eleven new tops. They are useful because each demonstrates one of the mechanisms above: an easy cuff, an earlier endpoint, controlled volume or a cleaner way to layer.
Does the sleeve reveal the forearm easily? · Does it stop at a useful point? · Is the volume controlled? · Can another cuff or layer continue the line without bulk?
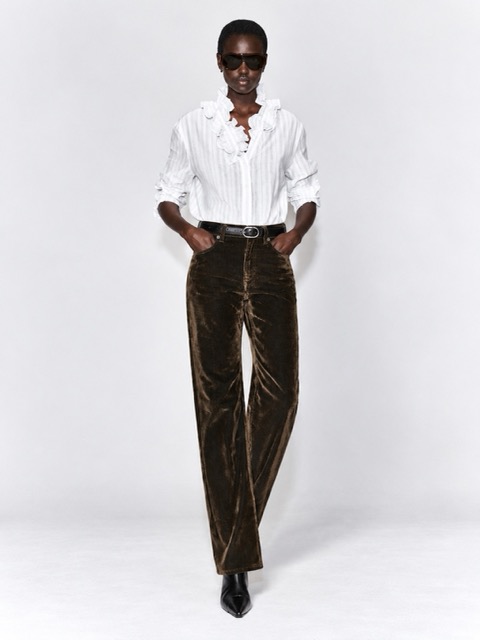
Ruffle-Collar Seersucker Blouse
The soft sleeve can be pushed and gathered without creating a hard block around the arm. It is a good example of the push it principle: volume above, visible forearm below.
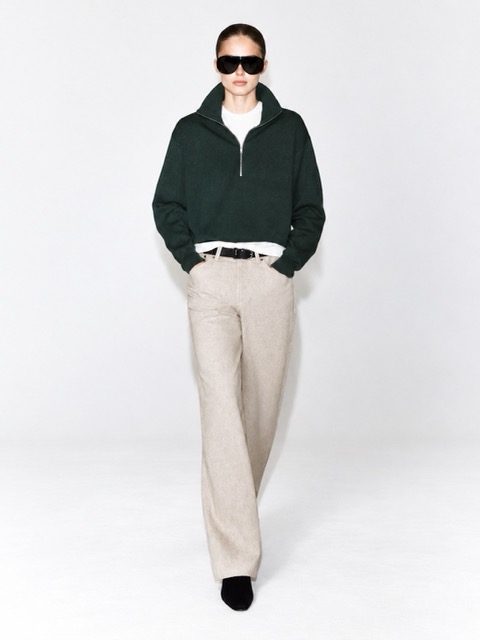
Mock-Neck Half-Zip Knitted Sweater
A soft knit sleeve that can be moved upward changes the proportion without changing the garment. Push it until enough forearm appears for the sleeve to feel intentional rather than simply long.
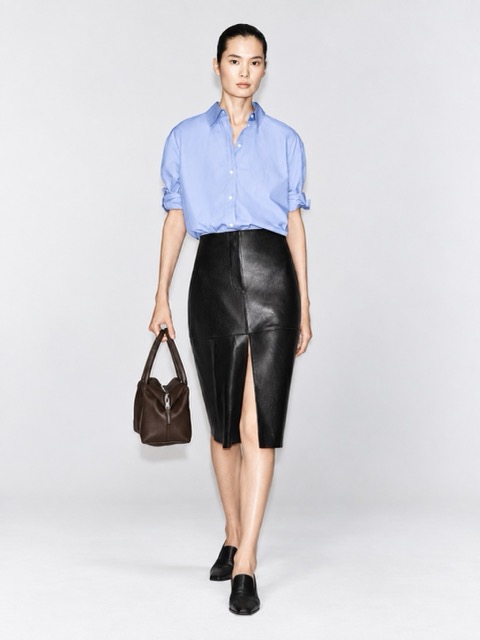
Folded-Cuff Cotton Shirt
This gives you a crisp interruption rather than a soft collapse. The cuff becomes part of the architecture of the outfit, while the visible arm keeps the shirt from feeling too enclosed.
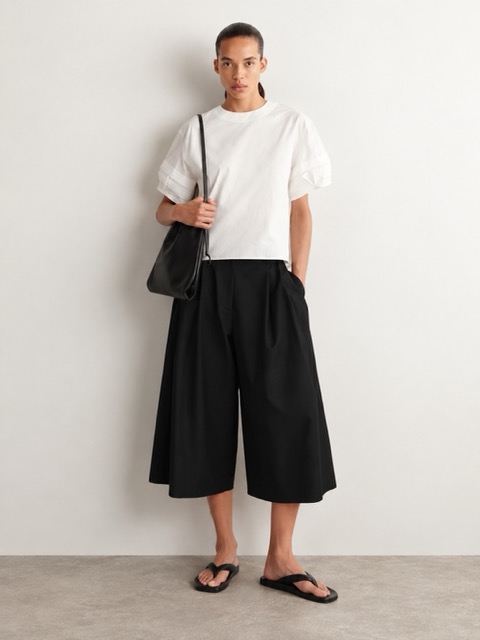
Pintucked Cotton Blouse
Here the answer is built into the cut. The sleeve simply stops sooner, leaving the lower arm free. Nothing needs rolling, pushing or rearranging.
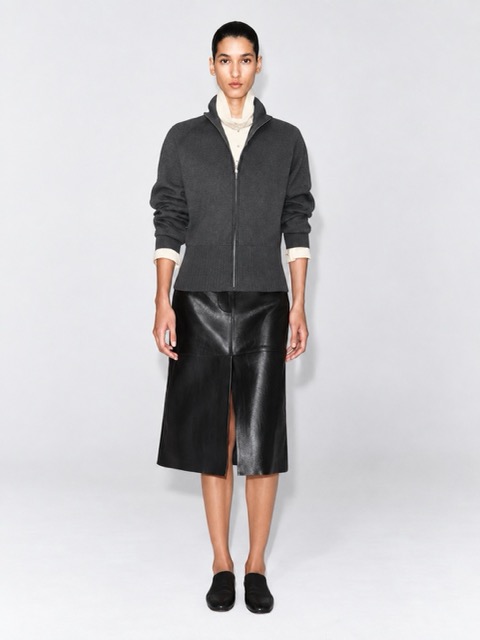
Knitted Mock-Neck Zip-Up Jacket
The clean knit sleeve gives you room to push it upward, while a shirt or narrow base layer can remain visible underneath. Useful when you want both repositioning and layering in one look.
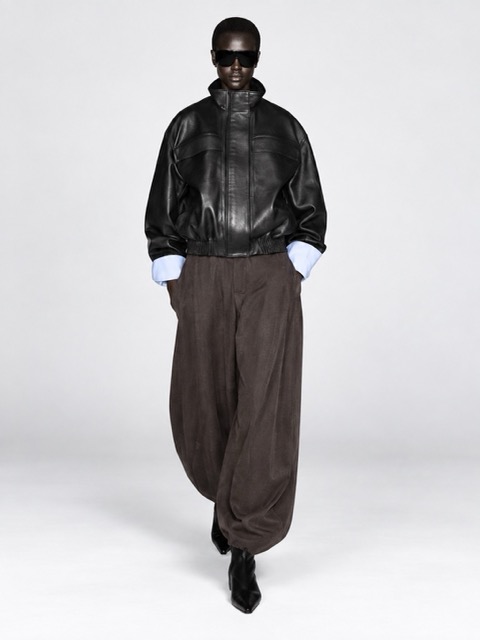
Leather Mock-Neck Bomber Jacket
This is the layering principle at its clearest: the outer sleeve ends, then the pale shirt cuff continues. Two endings, but one intentional line.
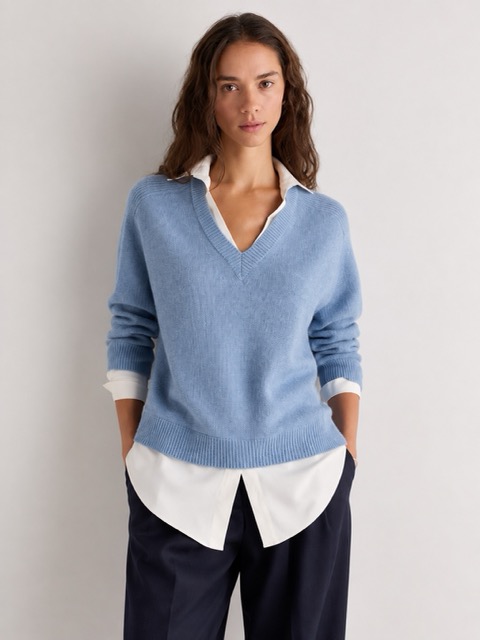
Quince 100% Mongolian Cashmere Layered V-Neck Sweater
The layered effect is already engineered into the piece. The visible collar, cuff and shirt hem create a continuation without asking you to fit two substantial garments on top of each other.
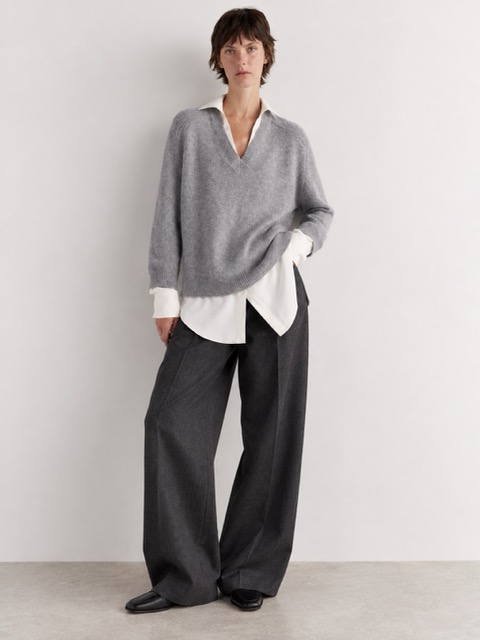
Quince 100% Mongolian Cashmere Layered V-Neck Sweater — Heather Grey
The same mechanism in a quieter grey palette. The important point is not the colour; it is the layered endpoint at collar, wrist and hem that makes an otherwise simple knit look more considered.
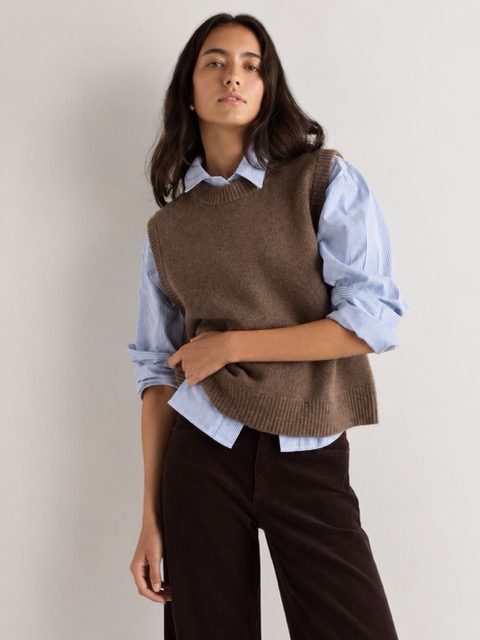
Quince 100% Yak Crewneck Sweater Vest
One of the most useful layering constructions here because there is no competing outer sleeve at all. You can use a crisp cuff, a soft blouse sleeve or a narrow jersey layer and let that underneath sleeve become part of the outfit.
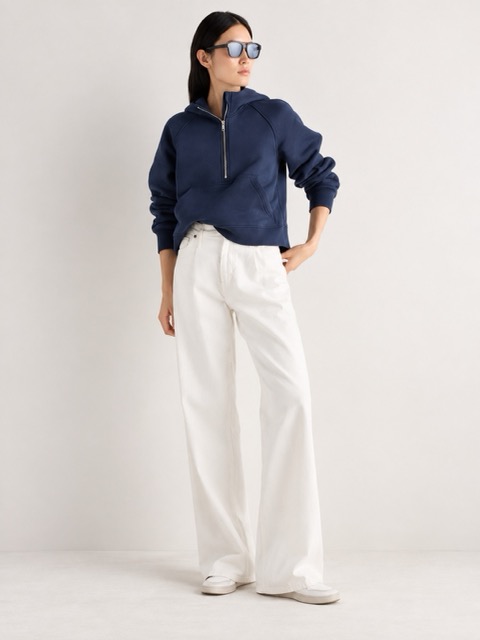
Everyday Fleece Cropped Half Zip Hoodie
The casual option. The cropped body and controllable cuff keep the sweatshirt from becoming one uninterrupted block of fabric, particularly when the sleeves are pushed slightly higher.
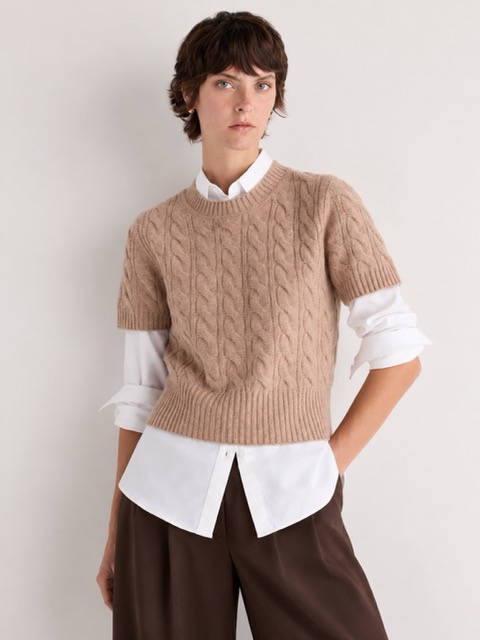
Mongolian Cashmere Shrunken Cable Tee
The short outer sleeve creates a completely different endpoint, while the shirt underneath continues the line. It combines end it early and layer it in the same outfit.
The one-second sleeve test
The next time a top makes you question your arms, ignore your arms for a moment and look only at the sleeve. Where does it end? How much forearm can you see? Is all the volume sitting at the wrist? Could the sleeve move upward? Would a shorter endpoint work better? Could another cuff continue the line?
That is a much more useful question than asking whether your arms are the problem. Most of the time, the body has not changed. The frame around it has.
I send practical style notes like this by email — proportion, current silhouettes, what is worth borrowing from trends, and what you can safely ignore.
Some product links in this article are affiliate links, which means Trends Spotted Fashion may receive a commission if you purchase through them, at no additional cost to you. Products are included for editorial and wardrobe-education purposes; availability and pricing may change.